Google's Fun Facts

Google's Fun Facts.

Use Google to learn a Quick Facts each day, Go to www.google.com and search "Fun Facts", you will get some interesting information to read. The result could be any fun facts from any of the information in this world or out of the world. Give it a try, you will be surprised with some of the facts.


Will Force Touch / 3D Touch Work on iPhone 6?

Will Force Touch / 3D Touch Work on iPhone 6?


Force Touch / 3D Touch


The Simplest Answer to the question will the force touch & 3D touch work on iPhone 6? is Big "NO". But why ForceTouch & 3D Touch doesn't work in iPhone 6, isn’t just a software change?
Force touch is not just a software change, It’s a hardware change. This is the reason iPhone 6s is little thicker than iPhone 6.

Look at the Image below to find the difference in Hardware Specification for iPhone 6s and iPhone 6


iPhone 6s Specification:


iPhone 6 Specification:


Topics

1) Code your Server.js - Node.js main file
        i) Importing libraries
        ii) Create Server and Handle Request
        iii) Play with Socket.io to do MultiChatting
2) Develop Webpage with Socket Javascript
3) Download Project here


1) Code your Server.js - Node.js main file

i) Importing libraries


 var http = require("http");
 var url = require('url');
 var fs = require('fs');
 var io = require('socket.io');

ii) Create Server and Handle Request

var server = http.createServer(function(request, response){
 
 var path = url.parse(request.url).pathname;
 console.log('Path='+path);
 switch(path){
  case '/':   
   fs.readFile(__dirname + "/index.html", function (error, data) {
    if (error) {
     response.writeHead(404);
     response.write("opps this doesn't exist - 404");
     response.end();  
    }  
    else{ 
     response.writeHeader(200, {"Content-Type": "text/html"});  
     response.write(data, "utf8");
     response.end();  
    }
   });
   break;
   
  case '/socket.html':
   fs.readFile(__dirname + path, function (error, data) {
    if (error) {
     response.writeHead(404);
     response.write("opps this doesn't exist - 404");
     response.end();  
    }  
    else{ 
     response.writeHeader(200, {"Content-Type": "text/html"});  
     response.write(data, "utf8");
     response.end();  
    }
   });
   break;
   
  default:
   console.log(path +"- Not found");
   response.writeHead(404);
   response.write("opps this doesn't exist - 404");
   response.end();
   break;
 }
 
});
server.listen(8001);

iii) Play with Socket.io to do MultiChatting


var serv_io = io.listen(server);
var textarea="";
var name="";
serv_io.sockets.on('connection', function(socket){
 //send data to client
 setInterval(function(){  
        socket.emit('date', {'date': getCurrentTime()}
 );
  
    }, 1000);
 
 socket.on('client_data', function(data){
  textarea=data.textarea;
  name=data.name;
  console.log("name="+name);
  //socket.emit('textarea', {'textarea': data.textarea});
  emitData(socket);
 });
 
    
});

function emitData(socket){ 
 socket.broadcast.emit('message', 
  {'date': getCurrentTime(),
   'name' : name,
   'textarea':textarea
  }
 );
}

function getCurrentTime(){
 var d = new Date();
 var curr_date = d.getDate();
 var curr_month = d.getMonth()+1;
 var curr_year = d.getFullYear();
 var curr_hour = d.getHours()%12 +"";
 var curr_min = d.getMinutes() + "";
 var curr_sec = d.getSeconds() + "";
 if(curr_hour.length == 1)
  curr_hour="0"+curr_hour;
 if(curr_min.length == 1)
  curr_min="0"+curr_min;
 if(curr_sec.length == 1)
  curr_sec="0"+curr_sec;
 
 //var dateString = sprintf("%2s-%2s-%s %2s:%2s:%2s ",curr_date,curr_month,curr_year,curr_hour,curr_min,curr_sec);
 var dateString = curr_date + "-" + curr_month + "-" + curr_year + "  " + curr_hour +":"+ curr_min +":"+ curr_sec;
 
 return dateString;
}

2) Develop Webpage with Socket Javascript

<html>
  <head>
    <script src="/socket.io/socket.io.js"></script>
 <script src="https://ajax.googleapis.com/ajax/libs/jquery/1.7.2/jquery.js"></script> 
 <style>
 .common{
  width: 200px;
  height: 30px;
  padding-left: 10px;
  
 }
 #date{
  color: green;
 }
 </style>
  </head>
  <body>
    <script>
  var socket = io.connect();
  socket.on('date', function(data){
   $('#date').text(data.date);
  });
  
  socket.on('message', function(data){   
   message=data.textarea;
   len=message.length;
   if(len > 0){
    printMessage(data.name,message);     
   }
  });
  
  
  $(document).ready(function(){
   $('#textarea').keypress(function(e){
   if ( event.which == 13 ) {
    message=$('#textarea').val();
    len=message.length;
    strname = $('#name').val();
    if(len > 0){
     socket.emit('client_data', {'name':strname,'textarea': message}); 
     printMessage(strname,message);     
    }
    $('#textarea').val("");
   }    
  });
  }); 
  
 function printMessage(strname,message){
  $('#messagearea').html($('#messagearea').html()+"<br/><span style='color:blue;font:18px;'>"+strname+"</span> : "+message);
 }
    </script>
    <div><h1>Welcome to Node.js Socket.io - Simple Multi Chat Application</h1></div>
 <b> Get tutorial here (Post your comments and query)</b> - <a href='http://www.coolcomputerpctricks.com'>www.coolcomputerpctricks.com</a><br><br>
 <b> Get Latest Code here </b> - <a href='https://github.com/karthikeyan98'>https://github.com/karthikeyan98</a>
 <br><br>Current Time: <span id="date"></span><br/>
 <input type="text" id="name" value="Guest" class="common"> - Type Name here<br/><br/>
 <textarea id="textarea" class="common"></textarea> - Type Message here and press Enter.
 <div id="messagearea"></div>
  </body>
</html>

3)  Download Project here

GitHub - https://github.com/karthikeyan98/SimpleMultiChat

Post your comments and query for any help.

Develop your first Android Game

How to develop android games?

Developing android games is simpler than you think.

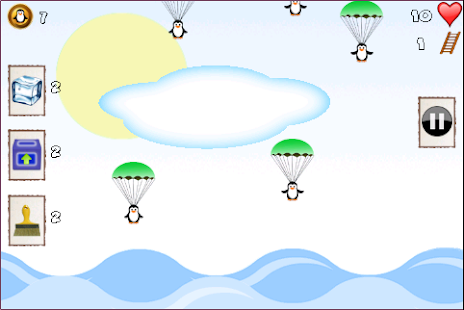
Check out this android game. Which is built using this technique.
Save Super Penguins
https://play.google.com/store/apps/details?id=com.positivesthinking.parachutepenguinsfree


Before starting the tutorial familiar yourself with android.

1. Set up the Android Workspace
https://developer.android.com/training/basics/firstapp/index.html

2. Create your Hello World Android application
https://developer.android.com/training/basics/firstapp/creating-project.html

Lets start the game development.

Just follow this Four Steps to start your first simple android game.
Step 1: Create a Game Loop Thread that renders the Frames.
Step 2: Create a SurfaceView class that will show the game UI and controls the game.
Step 3: Create a Image handler class that will help you in collision detection and loading bitmap images.
Step 4: Wire up your MainActivity.

Post your comments in case of any difficulty and help.

Step 1: Create a Game Loop Thread that renders the Frames.
MainThread.java.
package com.coolcomputerpctricks.tutorialgame;
import android.graphics.Canvas;
import android.util.Log;
import android.view.SurfaceHolder;

/** 
 *  www.coolcomputerpctricks.com
 *  Android Game development tutorial * 
 */

public class MainThread extends Thread {
 
 private static final String TAG = MainThread.class.getSimpleName();
 
 // Frames Per seconds
 public  int MAX_FPS = 150; 
 private  int FRAME_PERIOD = 1000 / MAX_FPS; 
 private SurfaceHolder surfaceHolder;
 private ViewGamePlay gamePanel;
 private boolean running;
 
 public void setRunning(boolean running) {
  this.running = running;
 }

 public MainThread(SurfaceHolder surfaceHolder, ViewGamePlay gamePanel) {
  super();
  this.surfaceHolder = surfaceHolder;
  this.gamePanel = gamePanel;
 }

 @Override
 public void run() {
  Canvas canvas;
  long beginTime;  
  long timeDiff;  
  int sleepTime;  
  sleepTime = 0;
  while (running) {   
   canvas = null;
   try {
    canvas = this.surfaceHolder.lockCanvas();
    synchronized (surfaceHolder) {
     beginTime = System.currentTimeMillis();
     this.gamePanel.render(canvas);    
     timeDiff = System.currentTimeMillis() - beginTime;
     sleepTime = (int)(FRAME_PERIOD - timeDiff);
     if (sleepTime > 0) { 
      try {
       Thread.sleep(sleepTime); 
      } catch (InterruptedException e) {}
     }
     
    }
   } finally {
    if (canvas != null) {
     surfaceHolder.unlockCanvasAndPost(canvas);
    }
   } 
  }
 } 
}

Step 2: Create a SurfaceView class that will show the game UI and controls the game.
ViewGamePlay.java
package com.coolcomputerpctricks.tutorialgame;

import java.util.Random;

import android.content.Context;
import android.graphics.BitmapFactory;
import android.graphics.Canvas;
import android.view.MotionEvent;
import android.view.SurfaceHolder;
import android.view.SurfaceView;
/** 
 *  www.coolcomputerpctricks.com
 *  Android Game development tutorial * 
 */

public class ViewGamePlay extends SurfaceView{

 
 MainThread thread;
 ItemImages bgImage,parachute;
 int max,min;
 
 public ViewGamePlay(Context context) {
  super(context);
  thread = new MainThread(getHolder(), this);
  getHolder().addCallback(new SurfaceHolder.Callback() {
   public void surfaceDestroyed(SurfaceHolder holder) {
    boolean retry = true;
    while (retry) {
     try {
      thread.setRunning(false);
      thread.join();
      retry = false;
     } catch (Exception e) {
      e.printStackTrace();      
     }
    }
   }
   public void surfaceCreated(SurfaceHolder holder) {
           
     Canvas c = holder.lockCanvas(null);
     initializeGame(c);
     drawGame(c);
     holder.unlockCanvasAndPost(c); 
     thread.setRunning(true);
     try{
      thread.start();
     }catch(Exception e){
      e.printStackTrace();
     }
   }

   public void surfaceChanged(SurfaceHolder holder, int format, int width, int height) {
    //Surface changed
   }
  });  

 }


 public void initializeGame(Canvas canvas){
  
  bgImage =  new  ItemImages(BitmapFactory.decodeResource(getResources(), R.drawable.sky),0,0);
  parachute = new  ItemImages(BitmapFactory.decodeResource(getResources(), R.drawable.parachute),0,0);
  
  //Random left position for the parachute
  max=(int) (canvas.getWidth()-parachute.getWidth());
  min=0;
  Random rand = new Random();  
  int randomNum = rand.nextInt((max - min) + 1) + min;
  parachute.setLeft(randomNum);
 
 }
 
 protected void drawGame(Canvas canvas) { 
  
  bgImage.drawBMP(canvas);
  parachute.drawBMP(canvas);
   
 } 
 
 
 public boolean onTouchEvent(MotionEvent event) {
  float x = event.getX();
  float y = event.getY();
  if(parachute.isCollition(x, y))
   {
    // If player touched, reset the parachute location
    parachute.setTop(0);
    Random rand = new Random();  
    int randomNum = rand.nextInt((max - min) + 1) + min;
    parachute.setLeft(randomNum);
    
   }
  return true;
 }
 
 public void render(Canvas canvas) {
  
  parachute.setTop(parachute.getTop()+2);
  
  if(parachute.getTop()>canvas.getHeight()){
   parachute.setTop(0);
   // Reset the parachute location
   parachute.setTop(0);
   Random rand = new Random();  
   int randomNum = rand.nextInt((max - min) + 1) + min;
   parachute.setLeft(randomNum);
  }  
  drawGame(canvas);
 }
 
 
}


Step 3: Create a Image handler class that will help you in collision detection and loading bitmap images.
ItemImages.java
package com.coolcomputerpctricks.tutorialgame;

import android.graphics.Bitmap;
import android.graphics.Canvas;
import android.graphics.Matrix;
import android.graphics.Rect;


/** 
 *  www.coolcomputerpctricks.com
 *  Android Game development tutorial * 
 */

public class ItemImages {
 private float width;
    private float height;
    private float left;
    private float top;
    private Bitmap bmp;
    private boolean visible; 
    
    public ItemImages(Bitmap bmp,float left, float top)
    {
     this.width = bmp.getWidth();  
        this.height = bmp.getHeight();
        this.bmp=bmp;
  this.left=left;
  this.top=top;
  this.setVisible(true);
    }
    public void setBmp(Bitmap bmp) {
  this.bmp = bmp;
 }
 public void drawBMP(Canvas canvas) {
  if(canvas!=null && bmp!=null)
   canvas.drawBitmap(bmp, left, top, null);
    }
    public void drawBMP(Canvas canvas,Rect src,Rect dst) {
  if(canvas!=null && bmp!=null)
   canvas.drawBitmap(bmp, src, dst, null);
    }
    public boolean isCollition(float x2, float y2) {
        return x2 > left && x2 < left + width && y2 > top && y2 < top + height;
    }
 public float getWidth() {
  return width;
 }
 public void setWidth(float width) {
  this.width = width;
 }
 public float getHeight() {
  return height;
 }
 public void setHeight(float height) {
  this.height = height;
 }
 public float getTop() {
  return top;
 }
 public void setTop(float top) {
  this.top = top;
 }
 public float getLeft() {
  return left;
 }
 public void setLeft(float left) {
  this.left = left;
 }
 public boolean isVisible() {
  return visible;
 }
 public void setVisible(boolean visible) {
  this.visible = visible;
 } 
}

Step 4: Wire up your MainActivity.
MainActivity.java


package com.coolcomputerpctricks.tutorialgame;

import android.app.Activity;
import android.os.Bundle;
import android.view.Menu;
/** 
 *  www.coolcomputerpctricks.com
 *  Android Game development tutorial * 
 */

public class MainActivity extends Activity {

 @Override
 protected void onCreate(Bundle savedInstanceState) {
  super.onCreate(savedInstanceState);
  
  setContentView( new ViewGamePlay(this)); 
 }


}

Here is the two images used in this tutorial


Sky.png

parachute.png


Download Project here

GitHub - https://github.com/karthikeyan98/SimpleGame-AndroidExample

Post your comments for any doubts and helps.


Most Difficult Hardest Android Games

Most Difficult Hardest Android Games 

1) World's Hardest Game


(Crossing More than 6th stage is difficult)


Description:
This is The World’s Hardest Game! Work your way through 30 incredibly hard levels, and if you can finish all of them you can compete for a spot on the world leader board!
Instructions:
You are RED square, avoid the BLUE circles and collect Yellow circles. Once you have collected all the yellow circles move to GREEN beacon to complete the level.
Your score is a reflection of how many times you have died; the less, the better.

2) Parachute Penguins


(Crossing More than 8 Level is Difficult)


Description:

Parachute Penguins. Save Penguins from the hungry and sharp jaws of Sharks waiting at the bottom of the sea.
Make use of Three Exciting Bonus Powers
1) Freeze - Freeze the flappy penguins bird for short period of time in the sky and let you save the penguins easily
2) Slow Motion - Flappy penguins bird drop at slow motion which will give you plenty time to save the penguins before it drops to sea under waiting sharks jaw.
3) Brush - Just swipe the screen with your finger to save multiple flappy bird penguins at the same time. This makes you little easier to save the penguins for particular period of time.
Bonus Powers Drop from the sky.
Frequently Bonus Powers Drop from the sky along with the the cute parachute penguins, catch Bonus Power Parachutes to increase your bonus power counts.
KidMode
KidMode Suitable for your kids to play, Save flappy bird penguins by just swiping the screen. KidMode doesnt support Highscore but it has 100 Life and just swiping the screen saves the flappy bird penguins drop from parachute.


3) Hardest Game Ever 2


Description:
Hardest Game Ever 2 is a series of fun and exciting mini-game that measures your reaction time to the milliseconds and pixels! See how fast you can slap and how sharp is your reaction to catch the eggs before they touch the floor in milliseconds! Hardest Game Ever 2 promises to bring you hours of adrenaline drain! Challenge your family and friends and find out who's got the fastest reaction on Android!
Featuring:
- Simple 3 Button Control
- 48 Stages with 4 Challenging Levels
- Ranking with Facebook Pals
- Simple yet addictive gameplay
- Multi-language Instructions

Are we trusting Google too much?

Are we trusting Google too much?

1. why should chrome warn us with a message when we clear browsing history?


Whenever we try to clear browsing history, chromes tells that there is incognito mode to use, is Google worried if you clear your entire browsing history from chrome?

What does Google do with your browsing history?
Here's a clear evidence, "YouTube", Google's YouTube shows video contents relevant to our browsing history stored in chrome. that's how your information is used to make you use their product(YouTube) more than what you do normally.
you can find the difference when you go to "YouTube" home page in both conditions
1. first without browsing history - everything cleared in chrome- visit YouTube home page
2. after doing couple of Google searches, let chrome shows some history and visit YouTube, you will feel the difference

2. why should chrome has separate log in session separating it from other google products.

when you logged in chrome, also when you logged in some of other google product like gmail, when you signout of gmail,chrome logged in session wont go.

chrome separate login session stores all your data ( you can control it by visiting settings, how many of us do that, what about people who doesn't have enough computer experience to change the settings ) user specific data stored in each of our google account right from browsing history to form input data's.

3. How does google map works - showing traffic information in the road we travel.


It does collect our location information including in which speed we are traveling, it collects every one who uses android mobile or signed in to google map atleast once and using some algorithm it gives back.


4. What will happen with Google Glass?

                    XX_____XX 

5. Not just above four items, there are lot more things.. like

     At first time when you open Google Chrome, it asks you to sign in with Google account. How many of you signed in without knowing that it is a log in for Google chrome to save your personal browsing data  in your account?
      Many would have no idea initially that it is a log-in specially for Google Chrome. and would have signed in directly thinking it is normal google product sign-in.

 Obviously, we are very much benefited and addicted to all those products, and there are ways we can control sharing our data to a certain level, but how many of us are really concerned about it, going to settings, searching where it is and switching it off?

Google's New Scientific Calculator

Google Launches its New Scientific Calculator.


If you type "Calculator" or "99/9" in google search, you will get the googles All New Scientific calculator.
Or if you do any mathematic calculations right away it will bring its Advanced Mathematical calculator
Try typing these things in google search for getting Google Scientific Calculator

Search it in Google - Calculator , 99/9 , Sin(90) , Sin 90,  log10 , like any mathematical calculations.
Its is as fast as google search results.


Google Restricts Labels in blogger (robot.txt)


Google Search restricts Labels (Categories) for all the blogs in Blogger (BlogSpot)

If you see something like this in your webmaster tools, be cool don’t worry for this.

This is because

Reason: Each Label entries are not sub pages, they are just a well framed search query
For example:
When you click the Label – Windows Trick in coolcomputricks.co.cc, the url pointing to that label is this

http://www.coolcomputricks.co.cc/search/label/Windows%20Trick

If you see this url carefully, you can see “/search/” in it, this means it is not actually a new page to be crawled by the Google search bot, it just a search query url, where all the pages yielded by this search query url is already indexed, so it just says it restricts the labels (search query url), but all the pages in your site is already indexed and included in search engine

The main idea behind having labels in the blogs or website, is to make the users comfortable in selecting categories they wished.

What should you do to make safe browsing, when using your friends laptop or using it in any Internet center.?

What should you do to temporarily erase the trace of what you searched for?

Keep the history unchanged, but temporarily disallow saving of histories, cookies, url names and everything.

Here is what you need to do.

Almost All the browsers has a concept called Private Browsing, Private Browsing helps not to save any information like histories, form entries, username, password, cookies, and everything you browsed for, so all the browsing entries can be unsaved for that particular time of browsing
For Chrome Users
1.       Click Settings ( Tool Icon on the top right corner of chrome)
2.       From the drop down, select “New Incognito Window

3.       You will now see a new window with a Detective Agent Logo on Top Left Corner, where you can make private browsing, credit card transactions, experiments, research, and anything that will not saved forever
4.       And when you close it, it goes normal, If you want to do Private browsing again, need to start from first

For Mozilla Firefox Users
1.       Click Firefox Button on the Left top corner
2.       Click “Start Private Browsing
3.       You will receive a alert box, click “Start Private Browsing” once again

4.       There you go, you will now see a new window that has changed color in the Firefox Button on the Left top corner enjoy private browsing, where you can make private browsing, credit card transactions, experiments, research, and anything that will not saved forever

For Internet Explorer Users
1.       Click Safety Menu on the Top right side of the Internet explorer
2.       Select “InPrivate Browsing

3.       There you go, you will now see a new window that has InPrivate icon on the address bar, enjoy private browsing, where you can make private browsing, credit card transactions, experiments, research, and anything that will not saved forever

convert string to dictionary in python

Cool trick to convert strings into dictionary object in Python Programming

Method 1: Using ast.literal_eval

## Example

import ast
strr = "{'a': 1, 'b': 2, 'c': 3}"
strr_dict=ast.literal_eval(strr)

Method 2: Using json
## Example

Make an Unchangeable Home Page

Computer Browser is one of the essential softwares that we use frequently, most of the people use computer because of browsing, This is the trick which will help you make your computer browsers home page to became unchangeable


Trick Your Friend my making his firefox, chrome , internet explorer or any other computer browser home page unchangeable.

Step-1: Right-click on the browser icon (firefox, chrome, Internet Explorer, etc.,) icon on your desktop and select "Properties".

Step-2: In the Target text box you will see "C:\Program Files\Mozilla Firefox\firefox.exe" or something similar to this

Step-3: Now add an URL or any address at the end in the Target text box

"C:\Program Files\Mozilla Firefox\firefox.exe" www.websitename.com

Step-4: This will make www.websitename.com to be the unchangeable home page, Even if your friend tries to change the homepage settings, it wont change.

Renaming Multiple Files

Windows XP Tips and Tricks - Renaming Multiple Files

In your computer, if you want to rename multiple files at once, like an array, this trick will be very useful.

Windows XP lets you rename files in bulk by simply selecting multiple files within Windows Explorer and pressing the F2 key. When you use this feature, the OS applies the name you enter to the first file and applies the same name with a number in parentheses to the other files you selected (the file extensions remain unchanged).

For example, if you select the following files,
* pics.jpg
* notes.txt
* myname.rtf
* music.mp3

and rename the first file (pics.jpg) to sample.doc, XP renames the remaining files as follows:
* Sample (1).jpg
* Sample (2).txt
* Sample (3).rtf
* Sample (4).mp3

Make Desktop wallpaper screensaver unchangeable

Make Your Desktop Wallpaper , ScreenSaver to be unchanged by anyone.


This trick is for Windows 7, it will work with windows vista and previous versions as well.


Step1: Open Run Window..


To open Run Window press( WindowsKey+R) or Click StartMenu and type Run to get it


Step2: Enter gpedit.msc in Run Window and press enter.


Step3: Now the Local Group Policy Editor Window will be opened ( look the picture below )


Step4: In the Left Pane of Local Group Policy Editor window Click User Configuration--> Templates ( look the picture below )


Step5: In the Right Pane of Local Group Policy Editor window Double Click Control Panel ( look the picture below )


Step6: Now In the Right Pane of Local Group Policy Editor window Open Personalization--> Changing desktop background ( look the picture below )


Step8: Now you will get a Prevent changing desktop background window, click Enabled Option and press Ok. ( look the picture below )


Step9: Now you can’t change your Desktop background Image. ( look the picture below )


Step10: To Once again Make the Desktop background to changeable Make the Option as Not Configured in Prevent changing desktop background window.


Step 11: Do the Same for Screen saver, Desktop icons, mouse pointers etc..

Google Chrome gets a new Icon

Google Chrome icon changed


New Chrome ICON
Old Chrome ICON


The new Google Chrome Icon is very simple and looks like it's a 2 dimension of the old chrome icon.

The new Icon has been changed automatically for all the users of chrome browser. it seems like update is going on for the application without the users knowledge.

Simple things are always powerful - secret of Google.

Two Secret Shortcuts for Windows 7

Two Secret Shortcuts for Windows 7 - Computer cool Tricks


ShortCut-1 : press WindowsKey + x


you will get Windows mobility center, where u can control things like

  • wifi adapter on/off
  • display brightness
  • volume control
  • projector or external display
  • battery charging and power options
  • synchronization
  • etc...


Shortcut-2: click and shake at top of any window faster.


This makes minimize all other opened windows, except the one u shaked.. a cool trick to your windows computer while working with multiple applications..


To test it do the following.

step1: Open up multiple windows of any choice ( like notepad, paint , browser ...).


step2: click on top of any of the window and shake it twice ( just hold your mouse button and move left to right and right to left twice fastly).


step3: u will notice that, all other windows getting minimized.


step4: also if u do that again, u can restore all the windows back.

Interesting !!! Google Vs Bing , Unbelievable Trick try it yourself.

Interesting !!! Google Vs Bing , Unbelievable Trick try it yourself.
Have you ever tried Automattic currency Conversion in Google or Bing search, There lies this interesting fact.Just have a look at it.. perhaps wait! how about Exploring this interesting crazy fact on your own with the help of following steps.

Step 1: Open your favourite Web browser twice (two windows or two tabs) open www.google.com in one and www.bing.com In another.


Step 2: Type the following in both the search bar and hit Enter.

1 euros in usd

Step 3: Well I searched at this time December 5 2010 8.24 pm look what I get. Having two different answers for same question

Google said 1 Euro = 1.3382 US $

Bing said 1 Euro = 1.34246 US $


Step 4: Which one is correct??????????!!!!!!!?????????

Step 5: Well According to Yahoo (OMG!!! another search engine) Currency convertion at this page http://finance.yahoo.com/currency-converter/#from=USD;to=EUR;amt=1.3399 says both are wrong.

Step 6: Well Let’s try some other site to verify it http://www.xe.com/ucc/convert.cgi?Amount=1&From=EUR&To=USD&image.x=63&image.y=21&image=Submit which says Google Data is better than bing and yahoo but not Accurate though !!!!!!.
Enable and Disable Thumbnail view (Most visited / Recently Closed) on the New tab of Google Chrome Browser

Disable
By Default you have the thumbnail view enabled, closing or disabling this view is very simple

Step 1: just click X – close button on the right side of the Most Visited or Recently closed frame.

Step 2: After clicking it, the thumbnail view will disappear.

Step 3: Though the thumbnail view disappeared, u can access the most visited and Recently closed items through links on the left down of the page in a simple view.

Enable

And to get back thumbnail view of Most visited or Recently Closed items
Step 1: click the “Most Visited” link (text) in the left down corner

Step 2: You will have your recently visited links poped up, now click the “Most Visited” link in the poped up window.


Step 3: now the Most Visited view will be appearing in the top of the page, click the arrow on the left side of it.


Step 4: That’s it You have your thumbnail view of Most Visited items back.

Step 5: Do the same for Recently Closed items .

Bug Exposed in Google Chrome Browser


Google Chrome Display Bug Exposed

Google browser Chrome - one of the newest widely used browser, has a funny display problem which is exposed, try this for yourself and have a look at it..

Step: 1 - Open Google Chrome Browser (well the latest version)

Step: 2 - Open Google mail ( www.gmail.com ) and log into your account

Step: 3 - Open any of your contacts chat window just like chatting ( but we not gonna chat here).

Step: 4 - with your middle mouse button - click hold and drag down on the down left corner of the chat box. see the below picture..


Step 5: Now you see the Nasty Trick of browser scrolling out the window itself. the chrome browser scrolls outside its level.. this makes browser lost its screen display area.

now go to address bar and browse other sites and have a funny display out of it..

Digg two Posts

Store your Gmail mails in Computer without using any Email Client

Gmail Offline

Gmail Offline is a Feature where you can Store your Mails, Chats, Attachments, labels in your personal Computer without having to use any Email clients like outlook.

Gmail Offline Let you to Synchronize all your Gmail contents to your PC when your connected to internet and makes u to work with your mails while not connected.


Enabling Gmail Offline Feature

1. Log into your Gmail
2. go to Settings->Offline
3. click "Enable offline mail for this Computer" and click "Save changes" button
4. Follow the instructions and Accept to install Google Gears which is less than 1 MB.
5. After this Few minutes Process, u'r Google mail gets synchronized to your PC
6. and you can access all your gmail contets offline by clicking the "Gmail Offline" icon on your Desktop


Advantage of Gmail Offline

1. Very Simple Feature and easy to use
2. No Additional Software to be Installed like outlook express etc..
3. And More Importantly its the Google's Product you can be sure of security of your personal file's

Disadvantage of Gmail Offline
1. You cannot specify selected mails to get saved in your Pc, instead all your mails within specified years are get stored.